An on-call calendar ensures urgent calls are routed to the right person on your team at the right time. Our virtual receptionists consult your script, which automatically updates based on your calendar. Once the on-call calendar is updated, the script automatically populates the team member’s name and phone number. Our receptionists use this script to transfer calls, live relay urgent messages, or send messages directly, so the right person always receives the information, and there’s no need to update your script manually each time.
You can set up and manage your on-call calendar directly in the AnswerConnect app.
Why use the on-call calendar?
Your business doesn’t stop when the office closes, and neither do urgent calls. With the on-call calendar, the right person is always ready to pick up. Teams use it in many ways:
- IT teams: Get alerted immediately when servers go down, no scrambling, no missed downtime.
- Doctors and clinics: After-hours calls route straight to the doctor or nurse on duty.
- Property managers: Emergencies like burst pipes are automatically sent to the staff on rotation.
- Law firms: One missed client call can be critical, but on-call scheduling ensures coverage.
- Service businesses: Urgent repair requests go to the technician on shift.
- Small businesses: Rotate after-hours responsibilities across the team so no one person is always “on call.”
Accessing the on-call calendar
Before you can see the calendar in your app, it must be enabled by the Client Services Team. The “Manage on-call schedule” button will only appear once it’s activated. To enable, contact us directly:
- US clients: 800-531-5828 | clientservices@answerconnect.com
- Canada clients: 800-858-1625 | help@answerconnect.com
Once enabled:
- Log in at my.answerconnect.app.
- Go to Settings > Live Receptionist > Overview.
- If you have multiple accounts, select the one you want to update.
- Select the Manage on-call schedule button.

Setting up your on-call calendar
Before you start, ensure everyone on the calendar is already added to your contacts with up-to-date phone numbers and emails.
To add or edit a calendar:
- Open the on-call calendar.
- Use the hamburger menu (top left) > Add a calendar to create a new one.
- Hover over an existing calendar to rename or delete it.

To add a schedule:
- Select the day > Add schedule.

2. Enter the time range, number of attempts, and choose the contact.
3. Select which phone number to use, even if only one is listed. Without a selection, calls default to messages.

If you would like to change how calls are handled (for example, from calls to messages or vice versa), please contact our Client Services Team. Updates to the on-call calendar alone won’t change this behaviour, as your script and call handling settings also need to be adjusted to ensure everything works correctly.
4. Add a delivery method (person’s name or a grouping).
5. If needed, add multiple contacts.
6. Click Save.
7. To change the order of contacts, drag and drop the schedule boxes.

Copying schedules:
Single day:
1. To copy one day to another, hover next to the date

2. Click the copy icon and select the new date
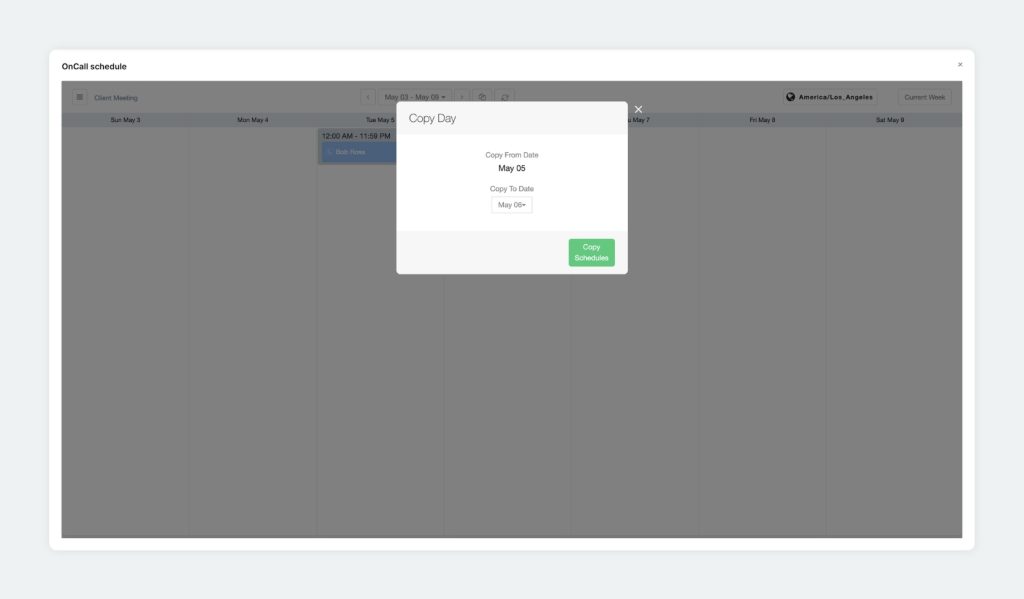
- Full range: To copy a full range of dates, click the copy icon > enter start and end dates > Copy.
Useful info
- Build your schedule as far in advance as needed.
- Edit schedules anytime, and changes take effect immediately.
Need help?
If you’d like assistance with integrating your on-call calendar into scripts or call flows, our Client Services Team is here to help:
- US clients: 800-531-5828 | clientservices@answerconnect.com
- Canada clients: 800-858-1625 | help@answerconnect.com