When you upload your contacts to AnswerConnect, they are automatically verified. So when they call in, their key details instantly populate on our receptionists’ answering script. That means no time is wasted asking for names, addresses, or other information. Your caller is recognized from the moment the call is answered.
This helps reduce call time and increase the accuracy of your messages. For example, rather than ask customers to spell their name, they can instead confirm it. When your callers are recognized like this, it creates a much more personal and smooth customer experience.
If you’re using our app, you can securely import your contacts using a CSV file or Google Contacts. If you are a HIPAA-covered entity, this contact import process is fully HIPAA compliant, helping you maintain privacy and regulatory alignment.
How to upload a single contact
If you just want to add one contact, you can do this directly in your AnswerConnect account:
- Log in and go to the Contacts section.
- Click the plus (+) icon in the top right corner.
- Select Add contact.
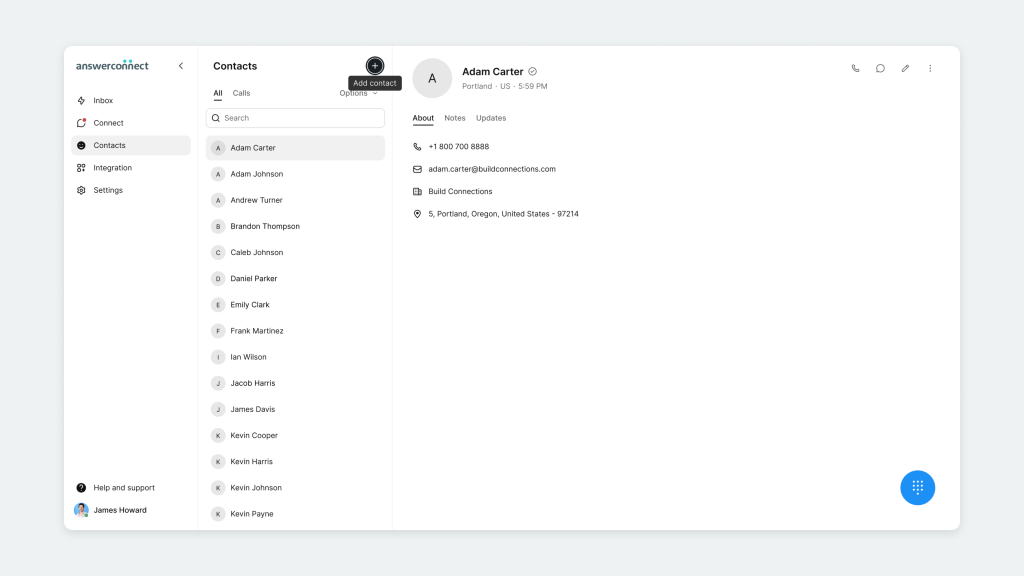
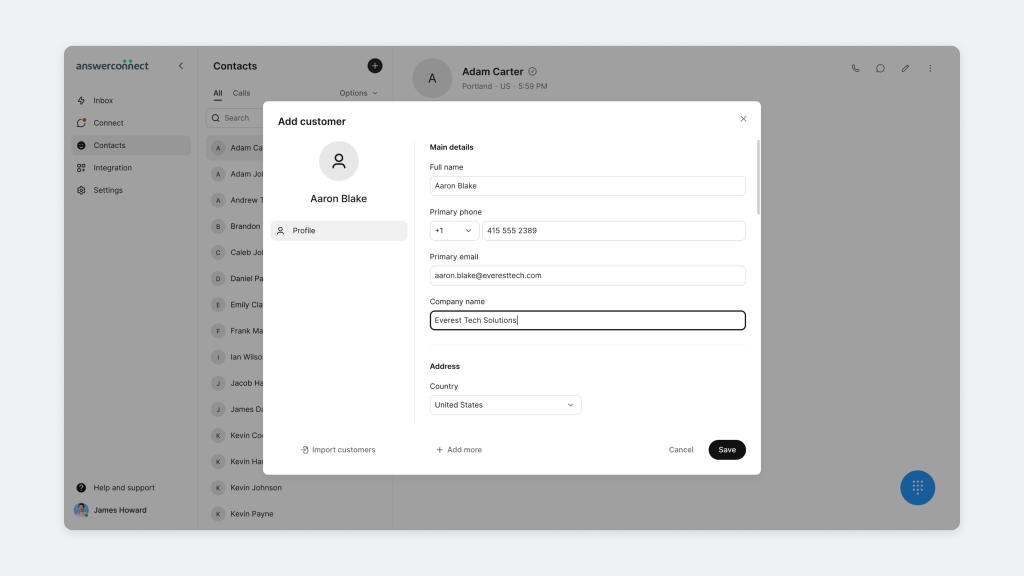
4. Enter the contact’s details and click Save.
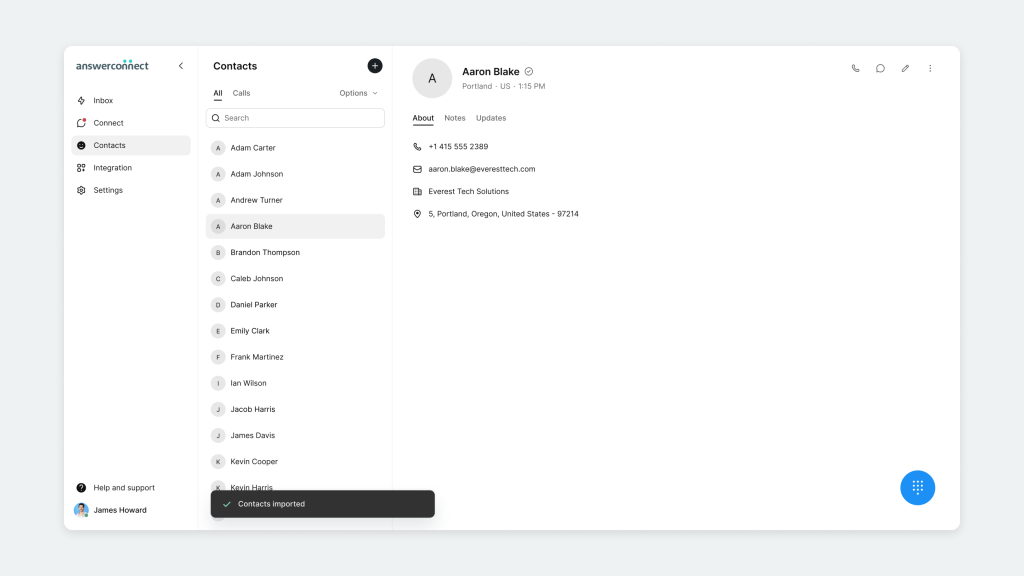
That’s it. Your new contact will now appear in your directory and sync with the AnswerConnect app, so your team and our receptionists have the latest info right at their fingertips.

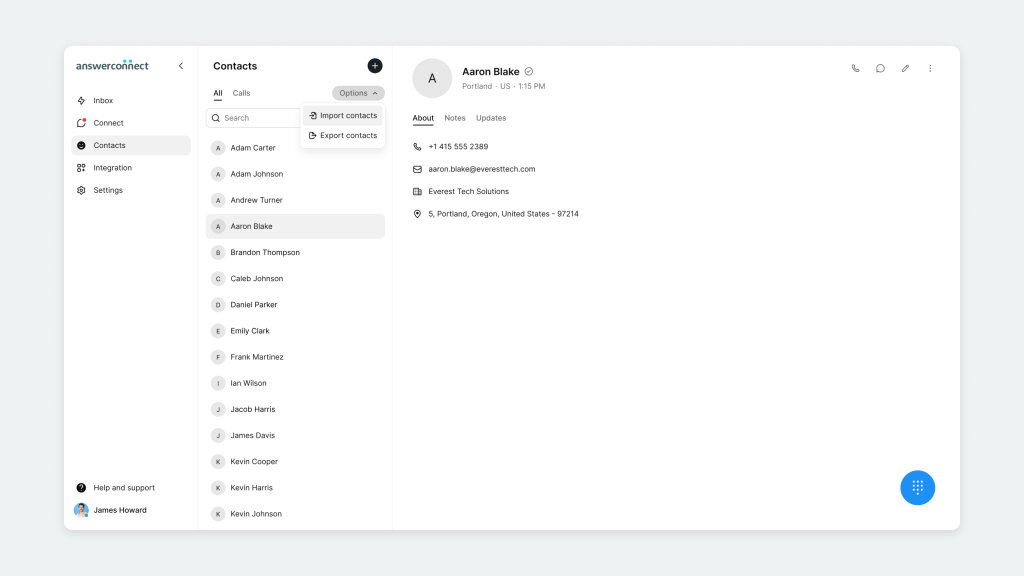
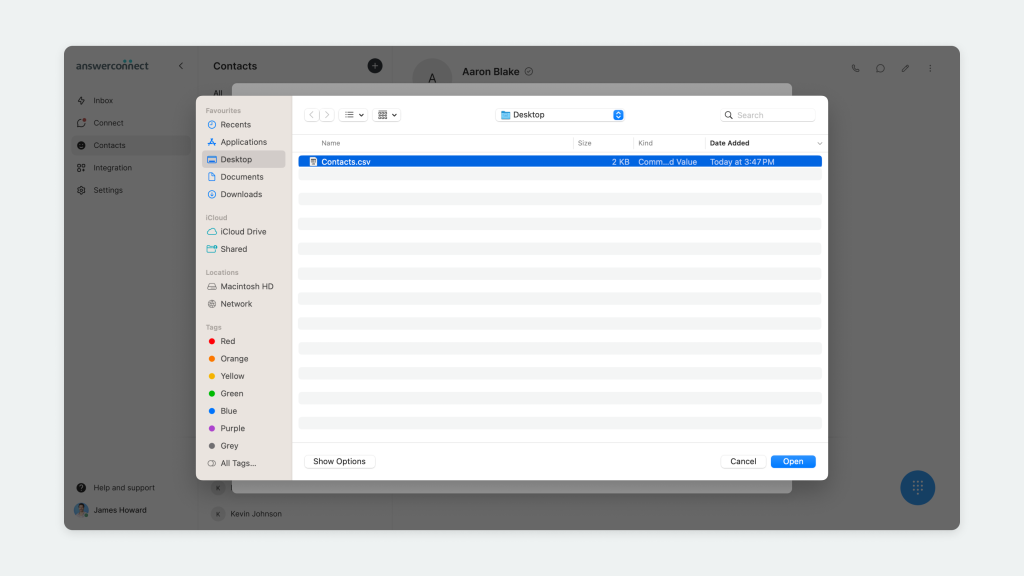
How to upload your contacts in bulk
- Log into your AnswerConnect account.
- Go to the Contacts section.
- Click on the Options menu.
- Select Import contacts.
5. Choose one of the following:
a. Import from CSV file
b. Import from Google Contacts
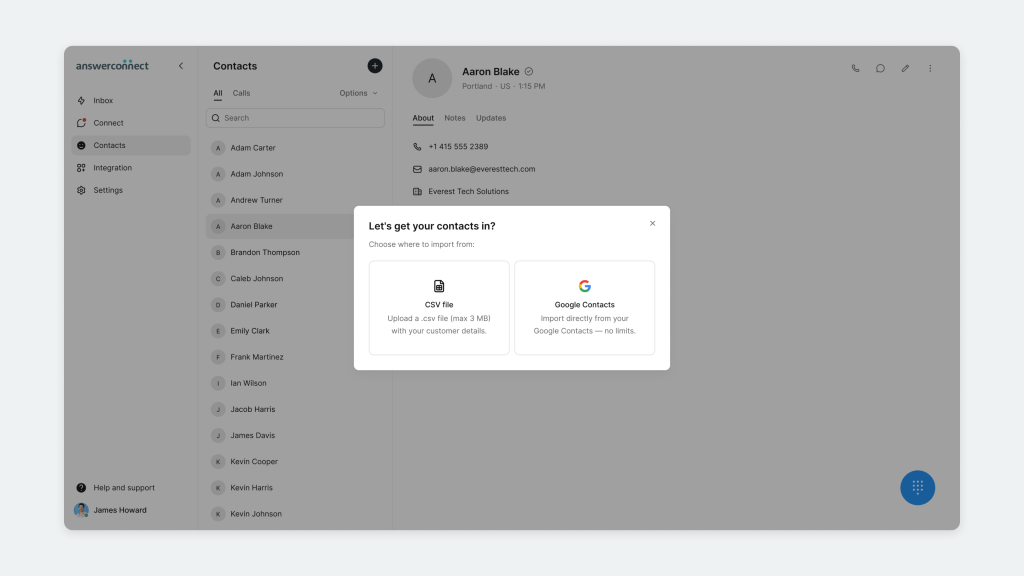
6. If uploading a CSV:
a. Upload your file (maximum 3 MB)
b. Map the supported fields in your spreadsheet: First Name, Last Name, Email, Phone, Address, City, State, Country, and Zip Code.
c. Review any flagged errors and make updates.

7. If using Google Contacts:
a. Sign in to your Google account and allow access.
b. Choose the contacts you want to import.
8. Confirm the import. You’ll see a progress indicator as your contacts upload.
That’s it! Your imported contacts will now show up in your directory.
How do I export contacts?
Exporting your contacts allows you to use your data outside the app for reporting, backups, or use in other tools.
To export your contacts:
- Log in to your AnswerConnect account.
- Go to the Contacts section.
- Click the Options menu.
- Select Export contacts.
- A confirmation message will appear showing how many contacts will be exported.
- Your contacts will download as a CSV file.
Need help?
If you need support, reach out to us:
- US clients: 800-531-5828 | clientservices@answerconnect.com
- Canada clients: 800-858-1625 | help@answerconnect.com