

Integrating with Salesforce allows you to instantly see every lead in one place. Automatically push caller information to the platform as a contact, lead, or ticket. Learn more about the integration here.
Activating the integration
Activating your Salesforce integration can be done in a few simple steps:
- Log in to the AnswerConnect app
- Select Integrations in the left navigation bar
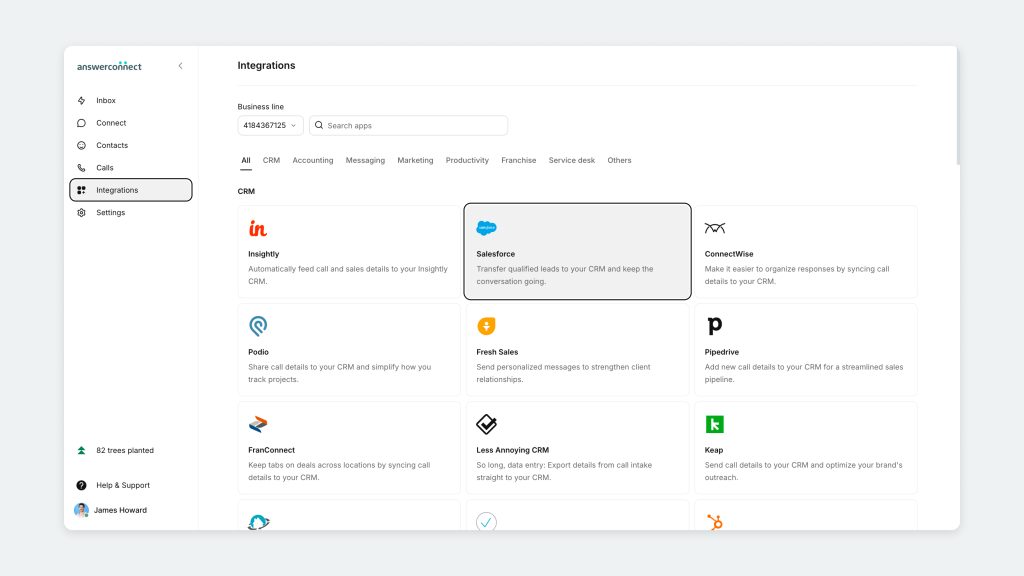
- Find the Salesforce integration card, and click it.
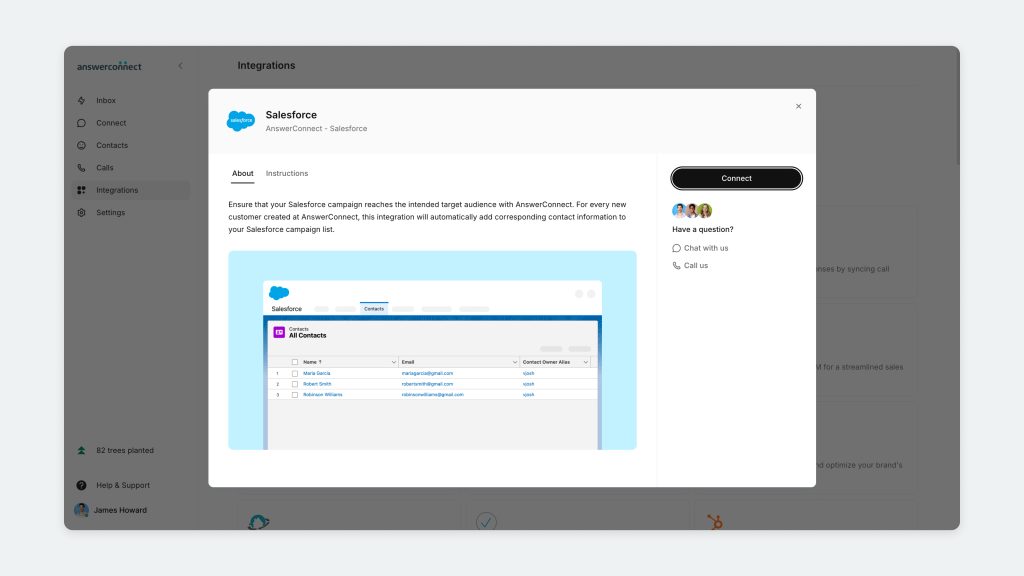
- Press the Connect button on the right-hand side of the Salesforce details window.
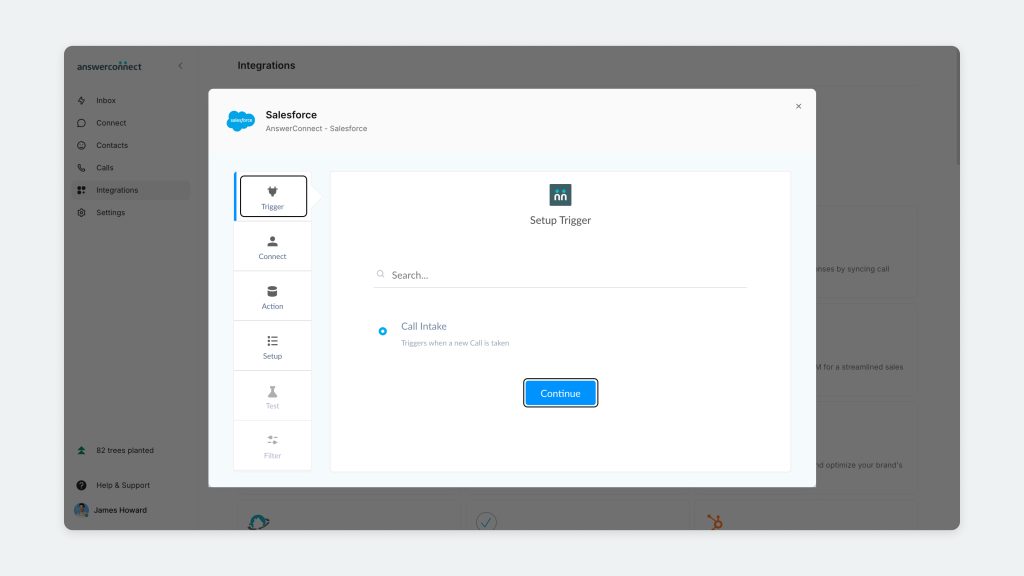
- First, you will select a Trigger. In this instance, you will choose Call Intake.
- You’ll be prompted to enter your Salesforce login information to continue.
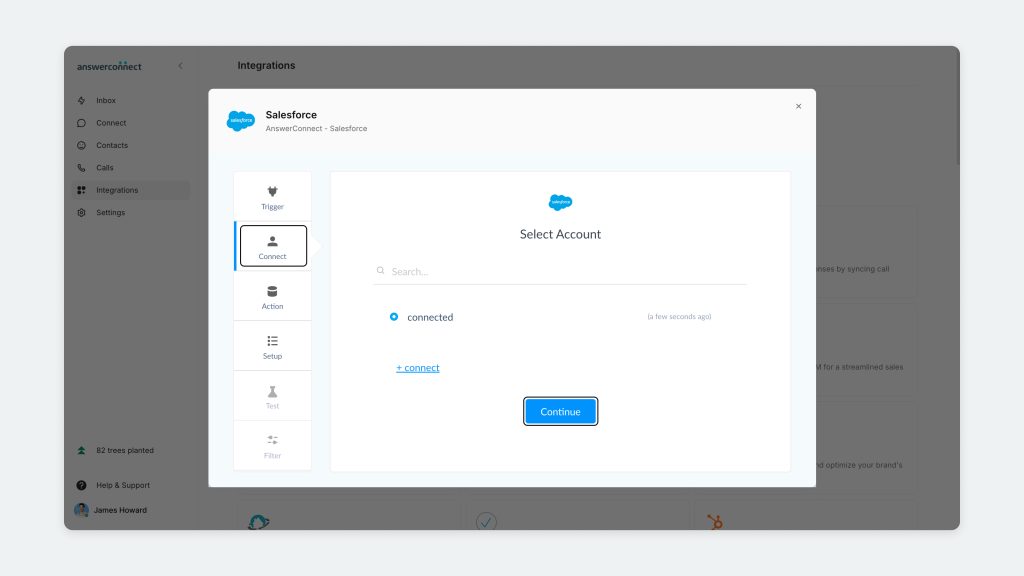
- Continue to the Connect tab and click Allow to allow access to your Salesforce account through AnswerConnect. We recommend that you rename the connection, then click Continue.
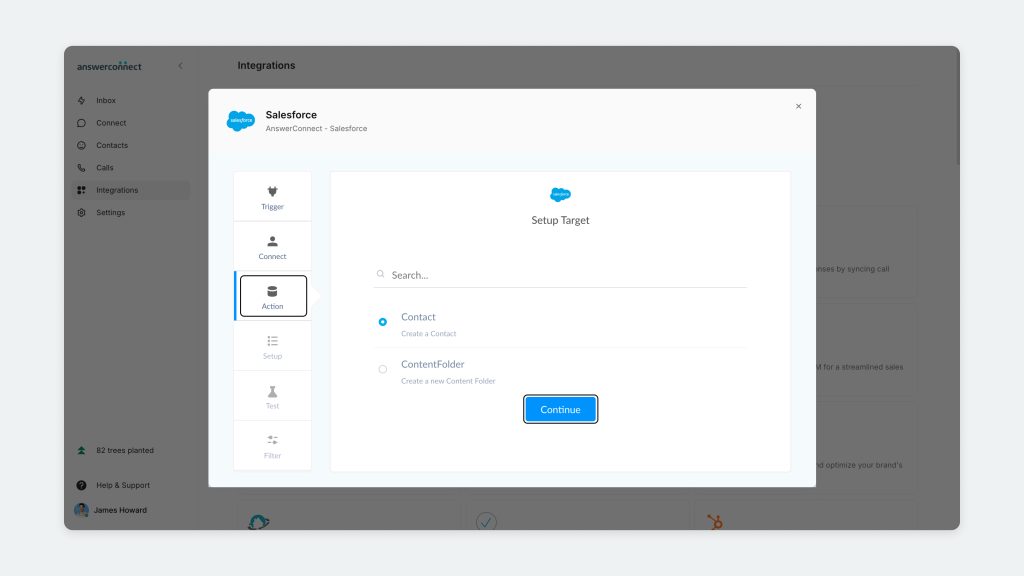
- In the Action tab, click Contact and Continue.
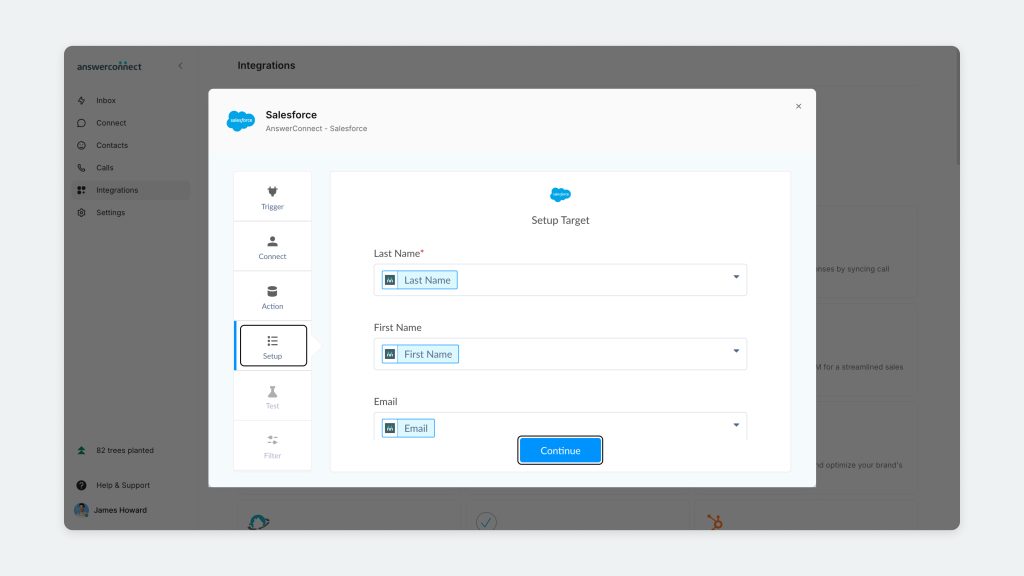
- In the Setup tab, you can add the contact fields that will be transferred from AnswerConnect to your Salesforce account. After mapping, click the Continue button at the bottom of the screen to proceed.
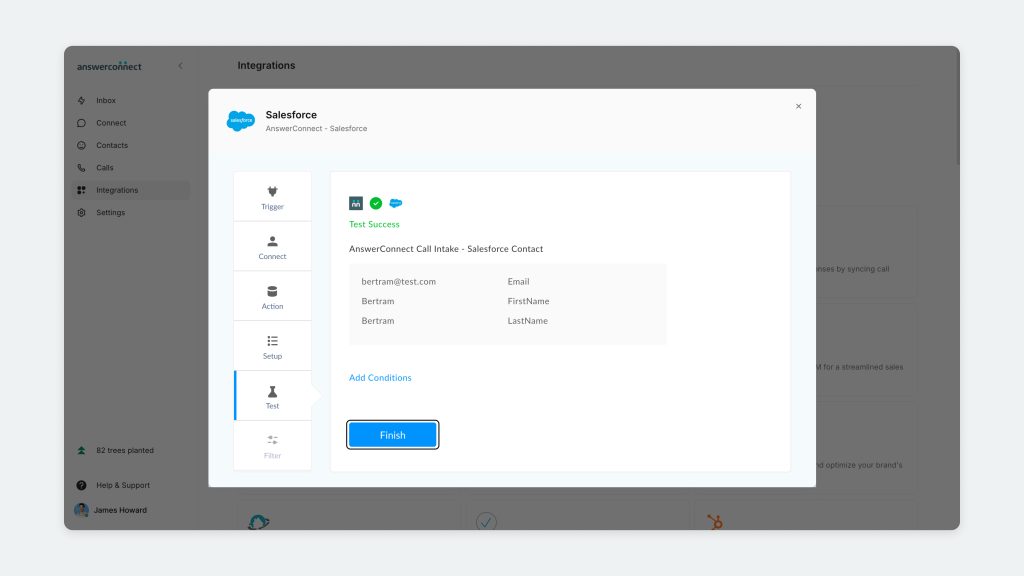
- In the Test tab, you have the opportunity to test the integration, or you can skip the test.
- Click Finish to complete the integration. The integration is now activated.
Alternative option: Activate the integration through Zapier
Another way you can integrate your answering account to Salesforce is through Zapier. Automate workflows between the two platforms based on the triggers and actions available in Zapier.
Visit the AnswerConnect and Salesforce integration page on Zapier to set up your integration.
Get in touch
If you have any questions or need assistance setting up your Salesforce integration, get in touch with our client services team – we’re happy to help.
US clients: 800-531-5828 | clientservices@answerconnect.com
Canada clients: 800-858-1625 | help@answerconnect.com