Verified Contacts allows our receptionists to deliver a more personalized experience, addressing callers by name and having their contact information ready and automatically populated in the script. This creates a smoother, streamlined customer experience, reducing repetitive questions and ultimately saving you money.
What are the benefits of Verified Contacts?
- Save money: By reducing the time your receptionists spend on repetitive tasks, contact verification helps streamline operations, reducing call time and saving you money.
- Improve efficiency: With verified contacts, our receptionists can focus on customer inquiries rather than spend time gathering information the client has already provided.
- Enhance customer experience: Offering a personalized, VIP service and addressing callers by name creates a smoother and more professional interaction.
How to verify a contact for caller recognition:
You can verify a contact in several ways:
- Automatic verification
We automatically verify the contact details of callers after three consecutive phone interactions with your receptionist (matching the name and phone number provided). - Import your customer list
Import contacts into the system in bulk by uploading a CSV file:
- Go to Contacts in your app.
- Click the + icon and select Import Contacts.
- Find your CSV file on your device and select Upload.
- That’s it! You should see your uploaded contacts on the list.
- To export your existing contacts, click Options > Export Customers.
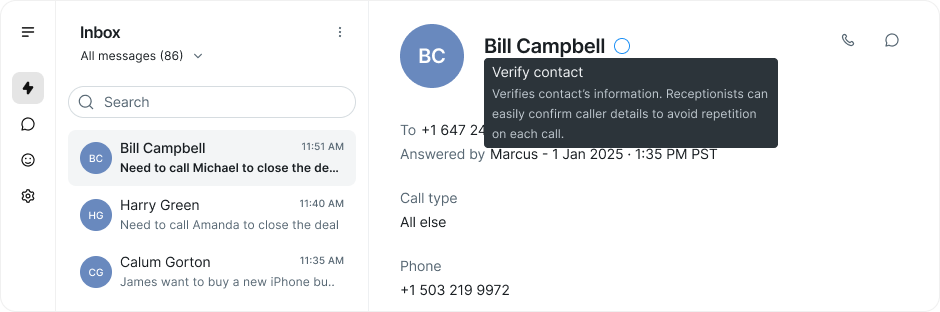
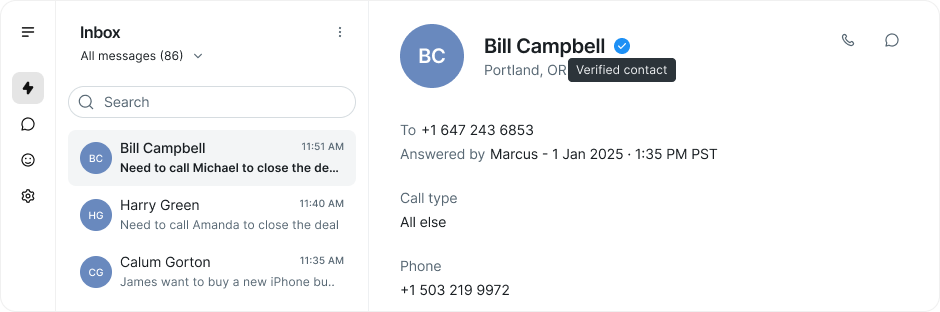
3. Verify from your AnswerConnect desktop/web app
- Locate the caller in your app’s Inbox.
- Click the white tick next to their name.
- The tick will turn blue, confirming the contact is verified.
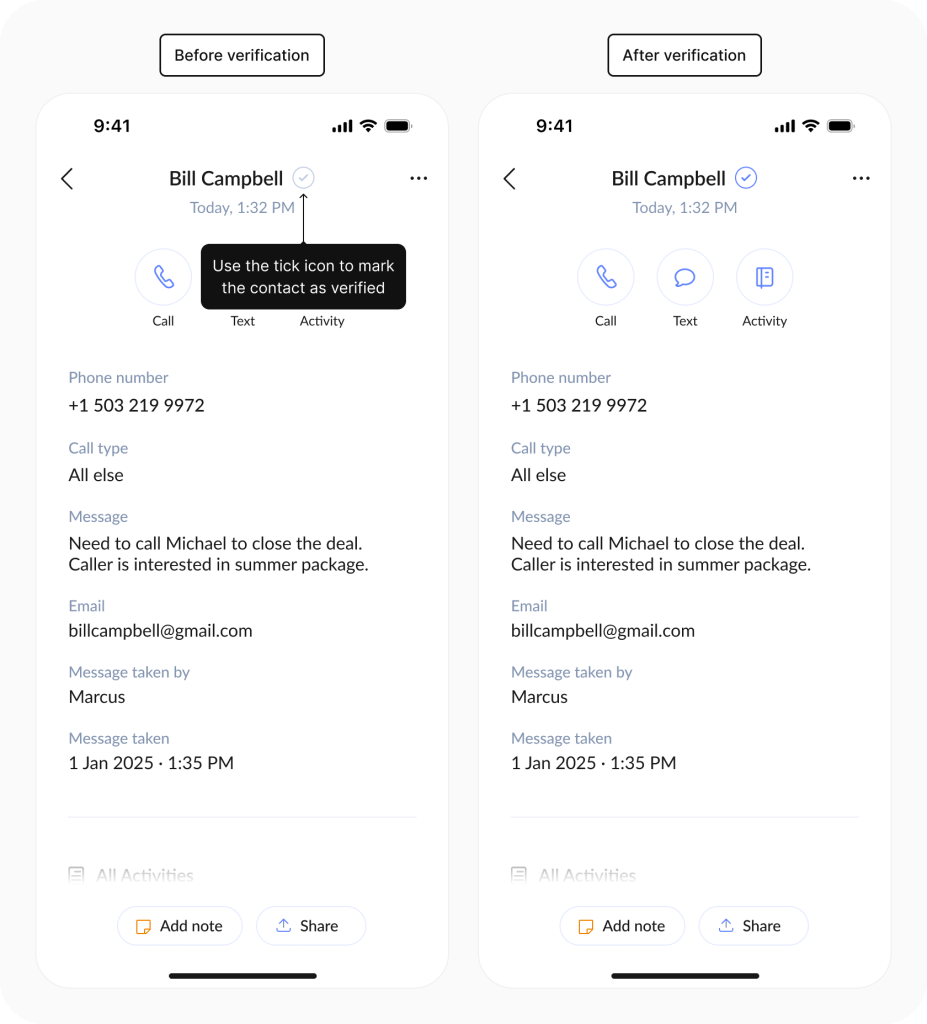
Before verification
After verification
4. Verify from mobile app
- Open the Inbox or Contacts section in the mobile app.
- Locate the caller and tap the tick icon to verify.
Disclaimer: The screenshots shown are based on the iOS version of the app. Android users may notice slight differences in appearance or layout.
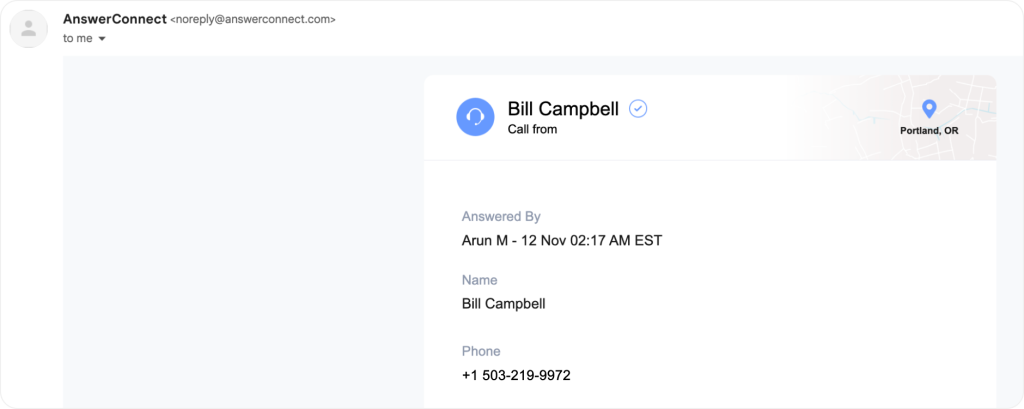
5. Email message verification
- In the HTML-enabled email summarising a call, click the checkmark icon next to the contact name. This redirects you to the desktop/web app, where the contact is verified.
Before verification
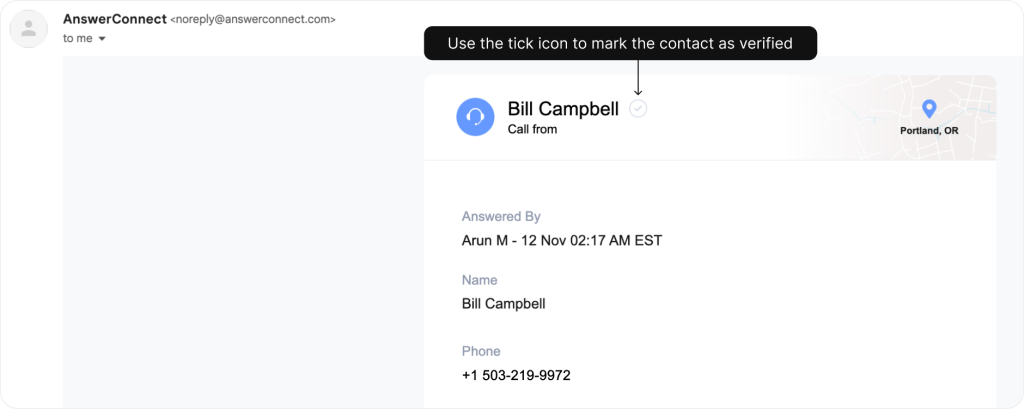
After verification
Removing contact verification
If you need to remove verification for a contact:
- Click the blue tick next to their name in the Inbox or Contacts section of your app.
- The tick will turn white, indicating the contact is no longer verified.
Need help?
Get in touch with our Client Services Team:
US clients: 800-531-5828 | clientservices@answerconnect.com
Canada clients: 800-858-1625 | help@answerconnect.com